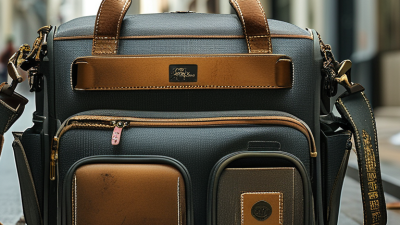
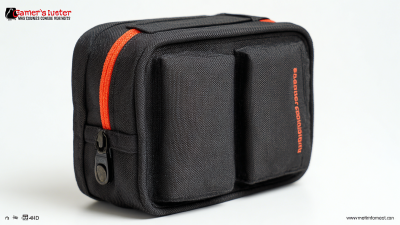
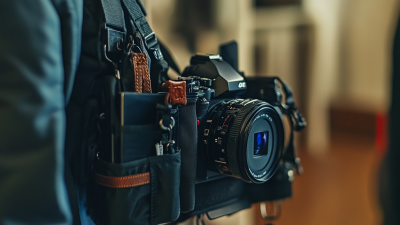
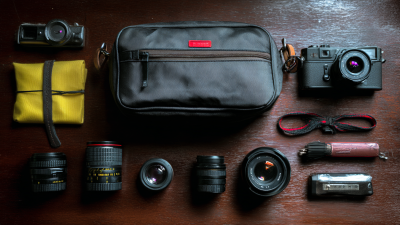
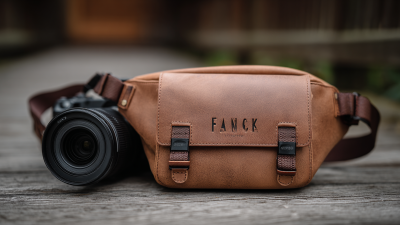
Travel photography rarely fails because of the camera itself. More often, small accessories disappear inside an overfilled backpack. A spare battery slips beneath a charging cable. Memory cards hide beside lens caps. That daily frustration makes a reliable Camera Organizer Pouch more than a simple storage accessory.
Professional photographer and educator Joe McNally has often shared a useful gear principle: “The more you know, the less you need.” His words encourage photographers to carry with intention, not simply add more equipment. A well-designed pouch supports that habit. It gives each item a visible place, reducing searching time beside crowded airports, dusty trails, or narrow hotel desks.
The best pouch should protect delicate gear without becoming bulky. Look for padded walls, flexible dividers, secure zippers, and water-resistant fabric. A transparent pocket can hold memory cards. Elastic loops can keep batteries upright. A wide opening helps you check the contents quickly. Small details matter.
Not every pouch fits every photographer. That is the uncomfortable part. A landscape shooter may need space for filters and cables, while a street photographer may prefer a slimmer profile. Some organizers feel excellent in a store but become awkward after several hours of travel. Real use reveals more than attractive product photos.
This guide examines the top Camera Organizer Pouch options for travel and gear storage. It considers capacity, protection, portability, organization, and everyday handling. The perfect choice may not exist. The better choice usually matches your actual routine.
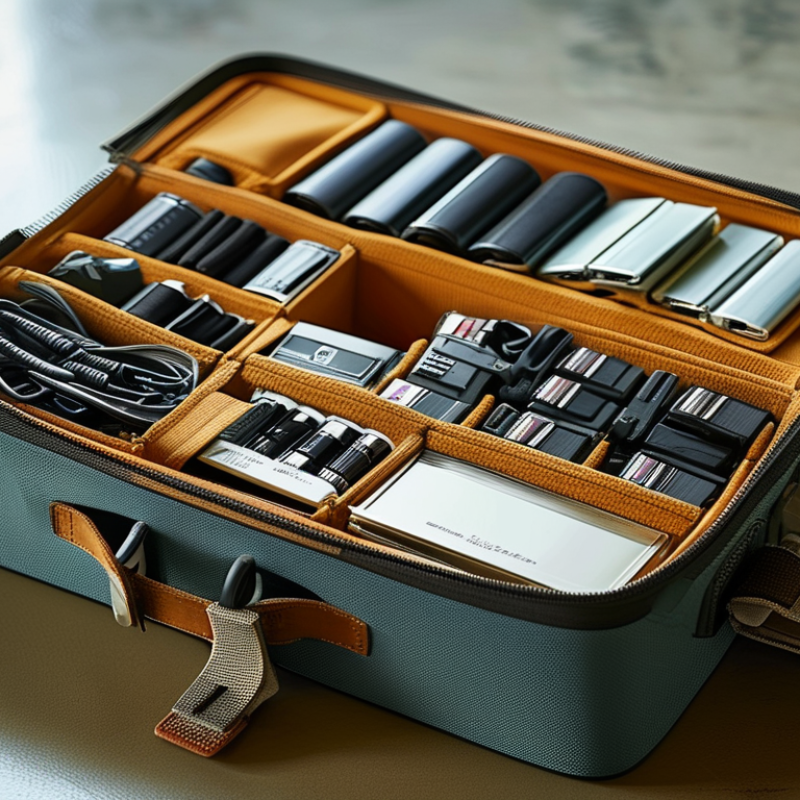
A camera organizer pouch is a compact protective case with adjustable compartments for camera bodies, lenses, batteries, cables, and memory cards. It works by separating fragile equipment, reducing contact between hard surfaces during travel. Most pouches use padded walls, movable dividers, and a secure zipper. The structure creates small storage zones inside one flexible container. A lens should sit upright when possible, while batteries need a separate pocket to prevent scratches and confusion. Small details matter.
In practice, I pack the heaviest item near the center of the pouch. This keeps the weight balanced inside a backpack or suitcase. I also leave a little space around each piece. Overpacking can press against lens caps and controls. It feels secure, but it may cause unnecessary pressure.
A soft divider protects better than loose clothing, especially when a bag shifts under an airplane seat. Clear labeling helps during low light. Keep essentials reachable.
The pouch also supports a simple workflow. Before leaving, I check the camera, spare battery, charger, and card compartment. After shooting, I return each item to its assigned space. This habit prevents rushed packing and missing accessories.
Still, no organizer replaces careful handling. A zipper can catch. A divider can move. I once trusted a crowded pouch too much and spent several minutes searching for one tiny adapter. That mistake changed how I pack: less gear, more visibility, and room for my hands.

A dependable camera organizer pouch should protect equipment before it reaches the destination. Its padding should feel firm, but not bulky. Adjustable dividers keep lenses, batteries, and cables from colliding during travel. A snug divider system prevents gear from knocking together on train rides or uneven walks. I also prefer a wide opening, because small compartments can hide loose accessories. That simple detail saves time when changing a battery or searching for a memory card. Water-resistant fabric and covered zippers help against light rain and accidental splashes. They do not make the pouch waterproof. That distinction matters.
The pouch should control weight as carefully as it controls storage. I once filled every compartment, and the bag became awkward to carry. It looked organized, but it was not practical. Now, I leave one section partly empty for quick access and last-minute items. A soft lining reduces surface scratches, while separate pockets keep cards away from metal accessories. A firm handle also helps when moving between a vehicle and a shooting location. Before travel, gently shake the closed pouch. If anything shifts, the dividers need adjustment. Check the seams and zipper after repeated use. No organizer is perfect. The best pouch fits the equipment you actually carry, not the equipment you might buy someday.
Top Camera Organizer Pouch for Travel and Gear Storage
How to Choose the Right Pouch for Travel and Equipment
Choosing a camera organizer pouch starts with your actual kit, not its advertised capacity. Lay out your camera body, lenses, batteries, cables, memory cards, and cleaning cloth. Measure the largest item, then allow a little space for padding. A pouch that fits perfectly at home may feel cramped during travel. I once selected a compact pouch that looked efficient, but its stiff dividers slowed me down at busy locations.
Check the padding, stitching, zippers, and interior layout carefully. Thick padding protects equipment, while soft lining helps prevent scratches. Separate pockets keep batteries and cards from rubbing against lenses. Water-resistant fabric is useful during light rain, but it is not a substitute for a protective bag. Look for a comfortable handle and a shape that fits inside your travel case. Smaller pouches are easier to carry, though they may force difficult compromises.
Tips: Pack the pouch before buying it. Test every zipper with one hand. Leave room for cables. Avoid loose movement inside. Choose bright interior fabric if possible; small accessories become easier to find. Recheck the weight when fully loaded. A durable pouch can still become uncomfortable after several hours. My own preference has changed over time, because I underestimated how tiring heavy gear feels during long walks.
Pack the camera body with its lens removed when space allows. This reduces pressure on the mount during movement. Wrap the body in a soft divider, then place it in the pouch’s central compartment. Lenses should stand upright, with caps firmly attached. Keep the heaviest lens near the pouch base. It prevents the organizer from tipping inside a backpack.
Separate batteries, memory cards, cables, and filters into small sections. Spare lithium batteries should remain protected from short circuits and follow current airline rules.
SITA’s 2024 Baggage IT Insights report recorded 6.9 mishandled bags per 1,000 passengers in 2023. Keep essential camera equipment in carry-on luggage when permitted. CIPA reported about 8.5 million digital still cameras shipped worldwide in 2024, showing how much equipment still travels with photographers.
Leave a little empty space. I often overpack one cable. That habit wastes room. Place a microfiber cloth on top for quick cleaning, but avoid pressing it against delicate controls. Check every zipper before leaving. A pouch is not magic. Dust can still enter through open caps, and loose batteries can scratch nearby gear. I prefer a simple handwritten inventory, although I sometimes forget to update it after a shoot.
Top Camera Organizer Pouch for Travel and Gear Storage
A well-organized camera pouch protects equipment before damage becomes visible. I check the pouch before every trip, especially after dusty outdoor work. Loose sand can scratch lenses, ports, and screens. Separate each item with padded dividers, and avoid packing the pouch until gear is completely dry. Moisture trapped overnight can encourage corrosion and fogging.
Tips: Clean gear gently with a blower and a clean microfiber cloth. Do not rub visible grit across glass. Store spare batteries in separate protective sleeves, away from coins or keys. Keep memory cards in labeled cases, not loose compartments. A small humidity indicator can reveal storage problems early.
I used to overpack my pouch, believing extra accessories meant better preparation. The result was pressure on cables and a bent divider. Now, I carry only the tools needed for the planned shoot. Inspect zippers, stitching, padding, and seams every few months. Replace damaged protection before travel, even if the pouch still looks usable. Store it in a cool, dry cabinet, away from direct sunlight. I sometimes forget to air it out after rainy trips, so a reminder near my storage shelf helps. Good maintenance is repetitive, but small habits protect expensive equipment over many seasons.
| Storage Dimension | Recommended Standard | Practical Use | Care or Maintenance Frequency | Important Precaution |
|---|---|---|---|---|
| Small pouch size | Approximately 20 × 12 × 6 cm (7.9 × 4.7 × 2.4 in) | Memory cards, spare batteries, cables, lens caps, and small adapters | Check contents before and after every trip | Do not overfill; excessive pressure can damage zippers and cable connectors |
| Medium pouch size | Approximately 25 × 18 × 9 cm (9.8 × 7.1 × 3.5 in) | One compact camera body, one small lens, batteries, charger, and accessories | Inspect padding, dividers, and stitching monthly | Keep heavier items close to the bottom and padded sides |
| Large pouch size | Approximately 32 × 23 × 12 cm (12.6 × 9.1 × 4.7 in) | Camera body, multiple lenses, batteries, cables, filters, and cleaning tools | Review load distribution before each journey | Use a separate camera bag or case when carrying fragile equipment for long distances |
| Interior protection | Closed-cell foam or padded fabric with soft, non-abrasive lining | Reduces contact between equipment and the pouch during transport | Check for flattened foam, loose lining, or exposed seams every 1–3 months | Replace damaged padding instead of placing delicate equipment directly against hard surfaces |
| Material and moisture control | Water-resistant outer fabric with a fully dry interior before storage | Helps reduce exposure to light splashes and everyday humidity | Air-dry after exposure to rain, snow, or high humidity | Water-resistant does not mean waterproof; do not submerge the pouch |
| Humidity management | Store gear in a cool, dry, ventilated location; use a reusable desiccant pack when appropriate | Limits moisture exposure during long-term storage | Inspect the storage area and desiccant condition monthly | Keep desiccant away from direct contact with camera surfaces and follow its reuse instructions |
| Battery storage | Remove batteries from equipment during extended storage and protect terminals from metal objects | Reduces the risk of leakage, short circuits, and accidental activation | Check charge level and physical condition every 2–3 months | Do not store swollen, damaged, hot, or leaking batteries in the pouch |
| Memory card organization | Use a rigid card case or dedicated elastic pocket with labeled compartments | Prevents cards from rubbing against keys, coins, or loose accessories | Confirm card labels and backups before each trip | Never force a memory card into a pocket or expose its contacts to liquids |
| Cleaning the pouch | Remove loose dust with a soft brush or low-pressure air; wipe fabric with a slightly damp cloth | Removes grit that can scratch equipment or obstruct zippers | Light cleaning monthly or whenever visible dirt appears | Avoid bleach, solvents, abrasive cleaners, and machine washing unless the care label permits it |
| Cleaning camera gear | Use a blower, lens brush, and clean microfiber cloth designed for optical surfaces | Reduces dust and fingerprints without unnecessary abrasion | Clean only when contamination is visible or affects handling | Do not touch optical surfaces with bare fingers or use household tissues |
| Zipper and closure care | Keep zipper tracks free of sand, lint, and fabric fibers | Maintains smooth closure and reduces zipper strain | Inspect before travel and after use in dusty or sandy environments | Never pull a stuck zipper with excessive force; remove the obstruction first |
| Temperature transition | Allow cold equipment to warm gradually inside the closed pouch | Reduces condensation when moving from cold outdoor air to a warm indoor environment | Apply after every significant temperature change | Do not open the pouch immediately when condensation may form |
| Long-term storage position | Place the pouch upright or flat on a stable shelf, away from direct sunlight and heat sources | Helps preserve the pouch shape and protects contents from unnecessary pressure | Recheck condition every 2–3 months | Do not place heavy luggage on top of a pouch containing camera equipment |